In this tutorial, you’ll learn how to edit and style a bullet list design element step by step.
Step 1: Access the Edit Menu
Locate the bullet list element on your page.
Hover over the green menu at the top of the bullet list.
Select the Edit option to open the settings panel on the right-hand side.
Step 2: Adjust Bullet Settings
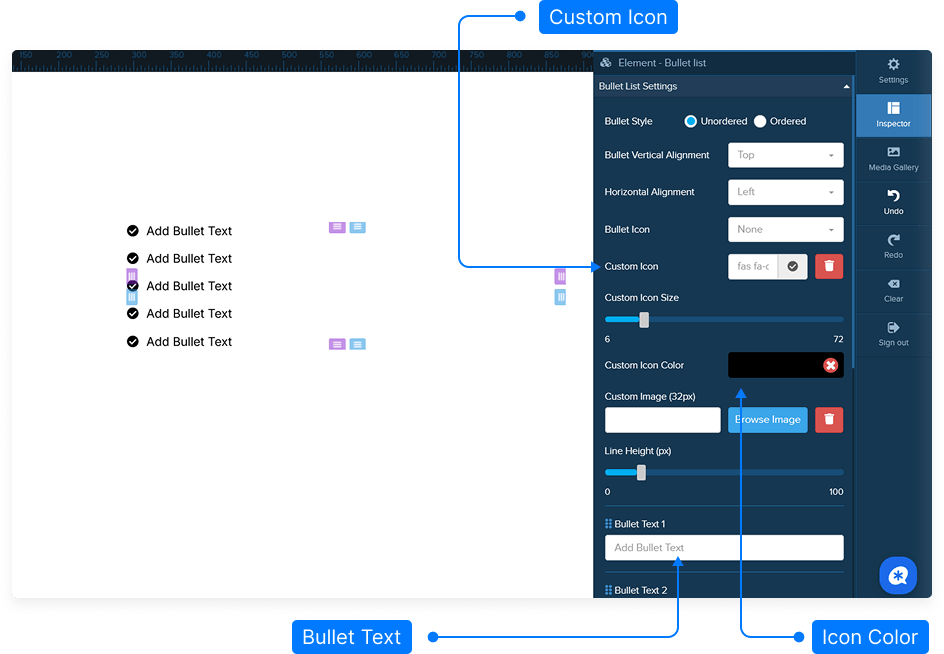
Within the settings panel, you can customize the bullet list appearance using the following options:
Bullet Style: Choose between unordered (•) or ordered (1., 2., 3.) styles.
Vertical Alignment: Align bullets vertically — top, middle, or bottom.
Bullet Icon Type: Select from default icons such as circle, disc, square, or choose no icon.
Custom Icon: Upload or select a custom icon to replace the default bullet.
Icon Size: Adjust the size of the bullet using the slider.
Icon Color: Change the bullet color to match your design theme.
Custom Image: Click Browse Image to select an image from your media gallery as a custom bullet.
Line Height: Adjust spacing between lines by moving the line height slider.
Add or Edit Bullets: Modify the text inside bullets or add new bullet points as needed.
Step 3: Modify Spacing and Layout
To fine-tune the placement of your bullet list, use the Padding and Margin settings:
Padding: Adjust internal spacing around the bullet list. You can move it down, up, or to the sides by dragging sliders or entering specific values.
Margin: Create outer spacing around the bullet list element. You can apply spacing individually (top, right, bottom, left) or to all sides at once using the “Select All” option.
Step 4: Customize Font and Text Style
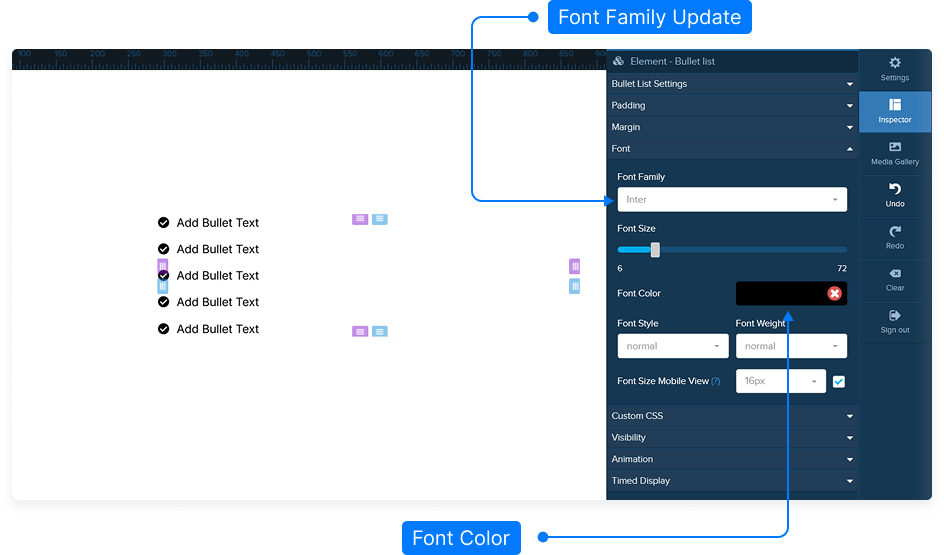
Enhance your list’s text appearance with font settings:
Select a Font Family from the available options.
Adjust Font Size using the slider or input box.
Choose a Font Color that fits your design palette.
Set the Font Style (normal, italic, etc.) and Font Weight (light, regular, bold).
Optionally, add custom CSS for advanced styling.
Step 5: Set Visibility Options
Control where your bullet list appears:
Choose to display the element on Desktop only, Mobile only, or on Both.
Step 6: Save Your Project
Once you’ve made your customizations, always remember to click Save to keep your changes.
That’s it! You’ve successfully customized a bullet list design element.