This step-by-step guide explains how to add and customize a countdown timer element on your page.
Step 1: Add the Countdown Timer
Open the Elements menu from the left-hand panel.
Select the Countdown element.
Drag and drop it into your desired column until you see the yellow placement bar appear.
Step 2: Access the Countdown Settings
Hover over the countdown timer on your page.
Click the Edit option from the green menu to open the inspector on the right-hand side.
Step 3: Customize Countdown Appearance and Settings
Countdown Library
Choose from preset color themes to quickly style your countdown timer.
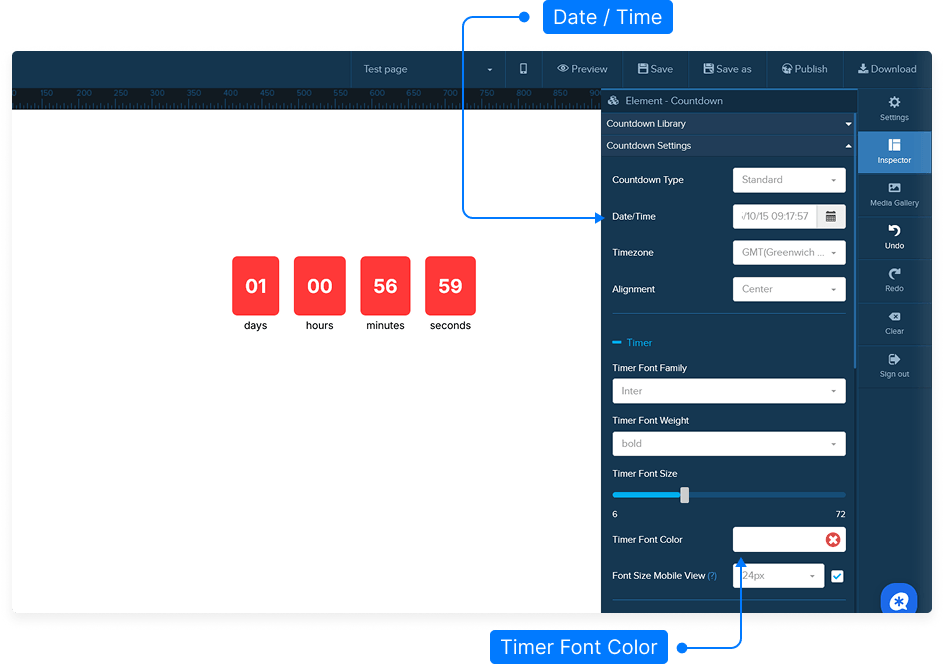
Countdown Settings
Start Date: Set the date and time for when your countdown should begin.
Time Zone: Select the correct time zone for your timer to ensure accuracy.
Alignment: Choose how the countdown should align within its section — left, center, or right.
Timer Font: Select the font family, weight, and size for the countdown numbers.
Timer Font Color: Adjust the color to match your design theme.
Label Font: Customize the text that appears below or above each timer panel:
Choose the font family and font size for labels.
Set the label color.
Choose the label position — top or bottom.
Panel Spacing: Adjust spacing between timer panels both vertically and horizontally.
Countdown End Behavior
Decide what happens when the countdown timer reaches zero:
Do nothing (keep the timer visible).
Redirect to another URL.
Hide the countdown timer entirely.
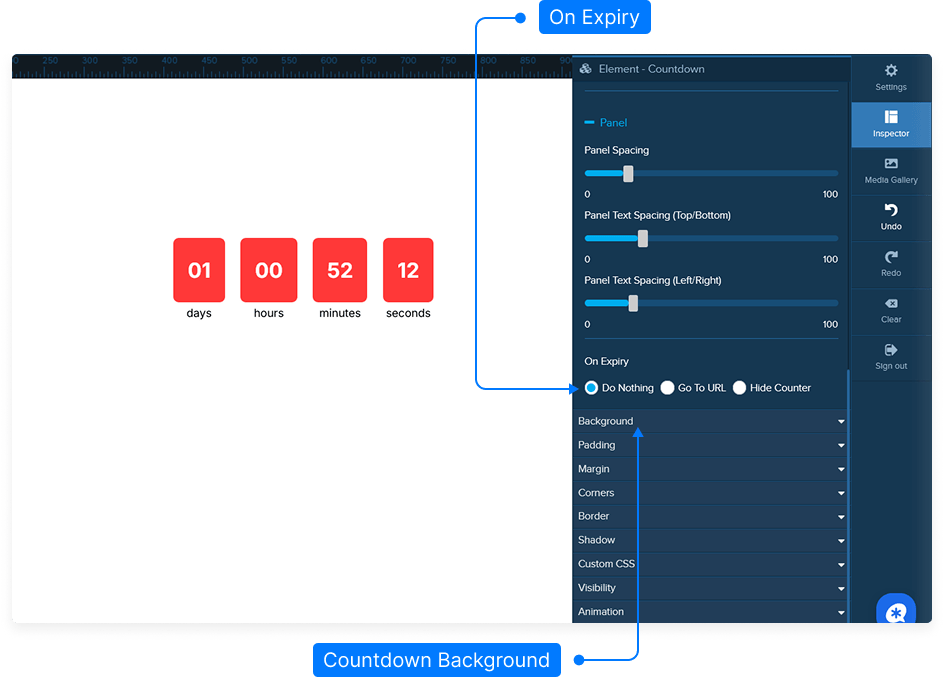
Step 4: Customize Background, Padding, and Borders
Background: Change the background color or image of the timer panels.
Padding: Adjust the internal spacing within the column containing the timer.
Margins: Define the outer space around the timer for better layout control.
Rounded Corners: Use the corner radius slider to make panel edges rounded.
Border: Add a border around the entire timer panel, customize its color, and thickness.
Shadow Effects: Add horizontal or vertical shadows, adjust the shadow radius, and pick a shadow color for a more dynamic look.
Step 5: Additional Options
Custom CSS: Add your own CSS code for advanced customization.
Visibility: Choose whether the countdown timer should be visible on desktop, mobile, or both.
Step 6: Save Your Page
After completing your changes, click Save to apply all updates.
That’s it! You’ve successfully customized your countdown timer element.