Follow these steps to properly set up your Facebook Open Graph information for your page. This ensures that your page preview looks professional and optimized when shared on Facebook.
Step 1: Open the Page Editor
Go to your main dashboard.
Open the project that contains the page you want to edit.
Enter the editor for that specific page.
Step 2: Access the Main Settings
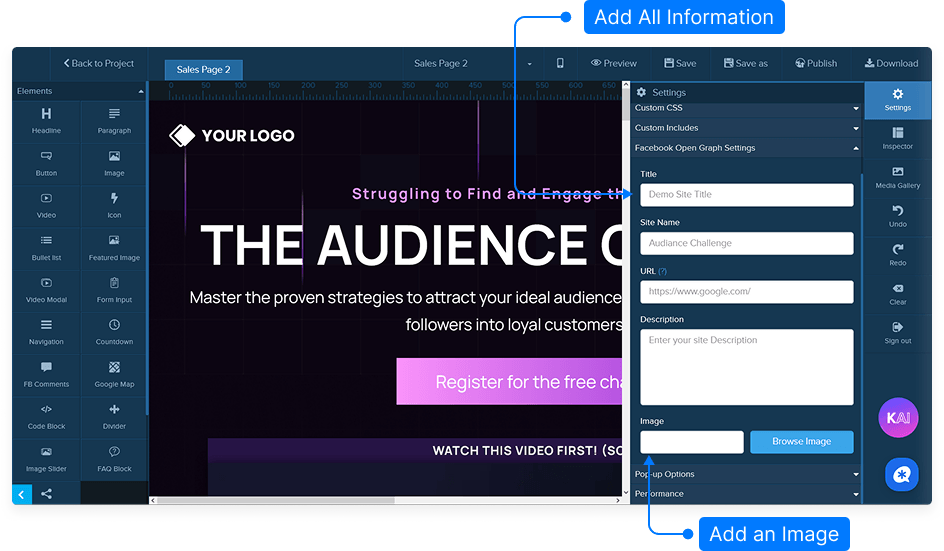
In the top-right corner of the editor, click the Main Settings icon.
Scroll down to find the Facebook Open Graph Settings section.
Step 3: Enter Open Graph Information
URL: Enter the URL of your published site.
Title & Description: Add a title and short description for the Facebook preview.
Site Name: Add Site Name
Image: Add an image to represent your page when shared on Facebook.
Step 4: Save Your Settings
Once all fields are filled in, click Save.
Your page is now connected with the Facebook Open Graph system.
Final Tip
Always double-check your Facebook preview after publishing to ensure your title, image, and description display correctly when shared.