This tutorial will show you how to use the Tags feature to organize and quickly filter your projects. Tags make it easy to manage a large number of projects by grouping them under custom labels with colors of your choice.
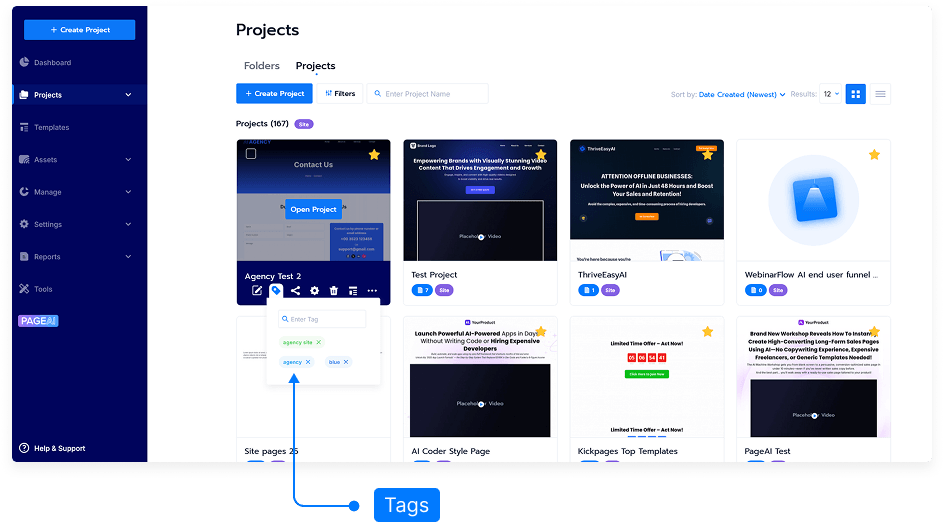
Step 1: Open the Tag Manager
Go to your project dashboard where all your projects are listed.
Locate the Tags icon next to your projects.
Click the icon to open the Tag Manager.
Step 2: Create a New Tag
In the Tag Manager, type the name of the tag you want to create.
Press Enter to confirm the tag name.
A color selection option will appear — choose a color that best represents your tag.
Click anywhere outside the color picker to save your new tag.
Step 3: Apply Tags to Projects
Select the projects you want to organize under this tag.
Apply the same tag name to each related project — this ensures they’re grouped together.
You can use multiple tags for a single project if needed.
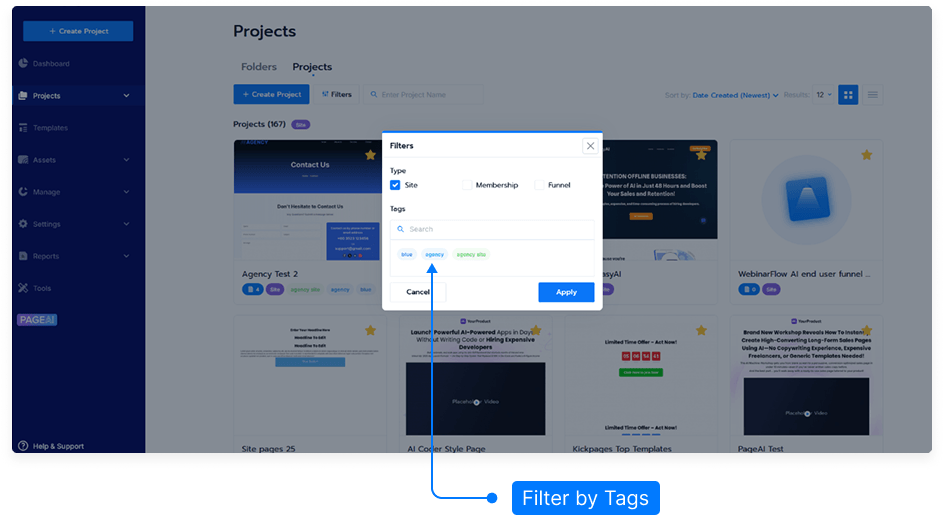
Step 4: Filter Projects by Tag
Use the filter or search bar in your project dashboard to view projects by tag.
Click a specific tag to display only the projects associated with it.
Click off or clear the filter to view all projects again.
Step 5: Manage or Edit Tags
To change a tag color, reopen the Tag Manager and select a new color.
To rename a tag, edit the text directly in the Tag Manager field.
To delete a tag, click the remove icon (if available) next to the tag name.
Step 6: Save and Refresh
After creating and applying your tags, make sure to Save your changes.
Refresh your project dashboard to confirm that the tags display correctly.
And that’s it! You’ve successfully learned how to use the Tags feature to organize, color-code, and quickly filter your projects for better workflow management.