This tutorial explains how to adjust transparency levels in gradient backgrounds to create softer or more vivid visual effects. By tweaking the transparency settings, you can control how much of the underlying content shows through the gradient overlay.
Step 1: Open the Section Settings
Locate the section on your page where you want to apply or edit a gradient background.
Click the Edit button on the dark blue menu to open the Inspector Panel.
Step 2: Select the Background Settings
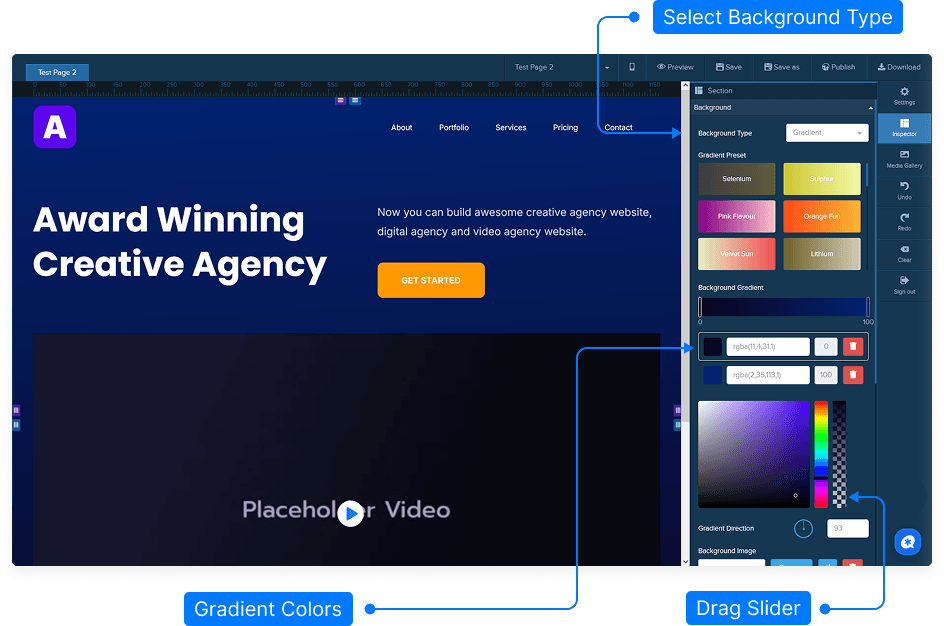
In the inspector, navigate to the Background tab.
Select Gradient as your background type.
Pick one of the available gradient presets or manually choose your own colors.
Step 3: Adjust the Gradient Transparency
Click one of the gradient color boxes to open the color selection panel.
Locate the Transparency Bar (usually displayed beside the color selector).
Drag the transparency slider:
Up: Makes the color more opaque (less see-through).
Down: Makes the color more transparent (lighter overlay).
Repeat the same adjustment for the second gradient color to balance both ends of the gradient.
Step 4: Fine-Tune Gradient Direction
In the gradient settings, adjust the Gradient Direction using the provided control or angle selector.
Preview how the gradient blends across your section as you modify the direction.
Step 5: Preview and Save Your Changes
Click Preview to view your updated gradient background with transparency applied.
Make any final adjustments if needed.
Once satisfied, click Save to apply the changes permanently.
And that’s it! You’ve successfully used transparency to fine-tune your gradient background, creating a smooth, professional, and customizable look for your design.