This tutorial will show you how to connect your ActiveCampaign account so you can easily send form submissions to your ActiveCampaign lists. Once integrated, you’ll be able to connect your page forms, map fields, apply tags, and save leads directly into ActiveCampaign.
Step 1: Get Your ActiveCampaign API Details
Log in to your ActiveCampaign account.
Click on Settings.
Click on Developer.
Copy your API URL.
Copy your API Key.
You can paste both details into a notepad temporarily so they are ready to copy into your platform.
Step 2: Open Integrations in Your Platform
Log in to your account.
Hover over the Manage menu.
Click Integrations.
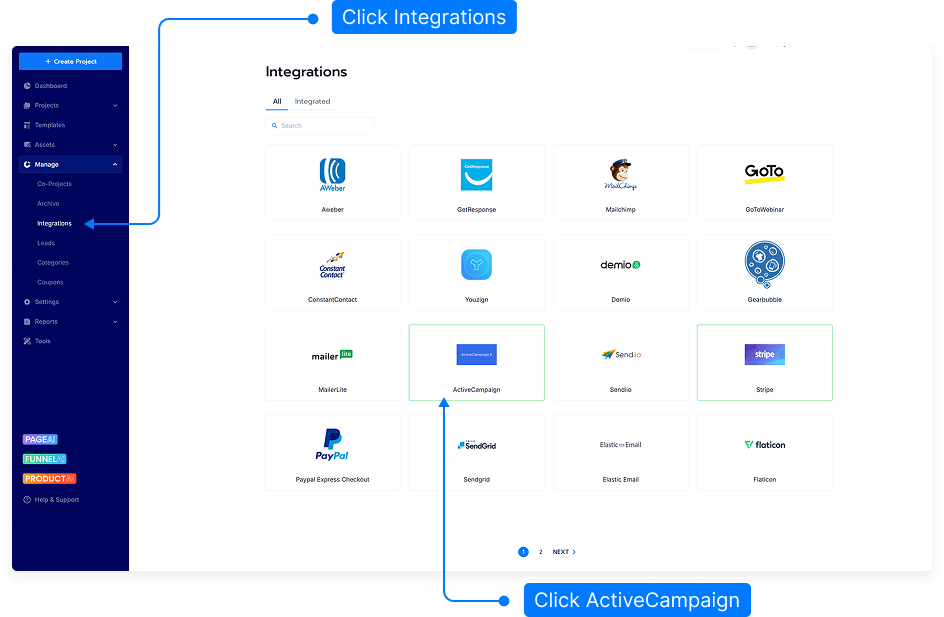
Step 3: Add ActiveCampaign Integration
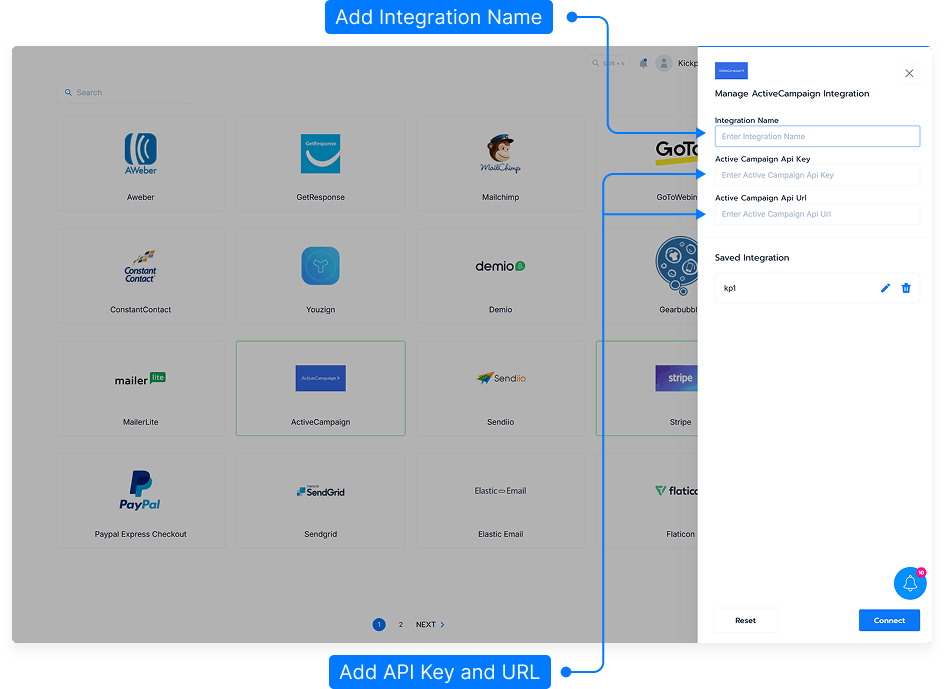
Click on the ActiveCampaign integration option.
Enter an Integration Name — this can be anything you like.
Paste your API Key into the first field.
Paste your API URL into the next field.
Click Save.
Step 4: Confirm ActiveCampaign Is Connected
Once saved, your ActiveCampaign account will be connected.
You can now use this integration when setting up forms inside your pages.
Step 5: Add or Select a Form on Your Page
Open the page where you want to collect leads.
Add your form fields, such as Name and Email.
Add or select the form submit button.
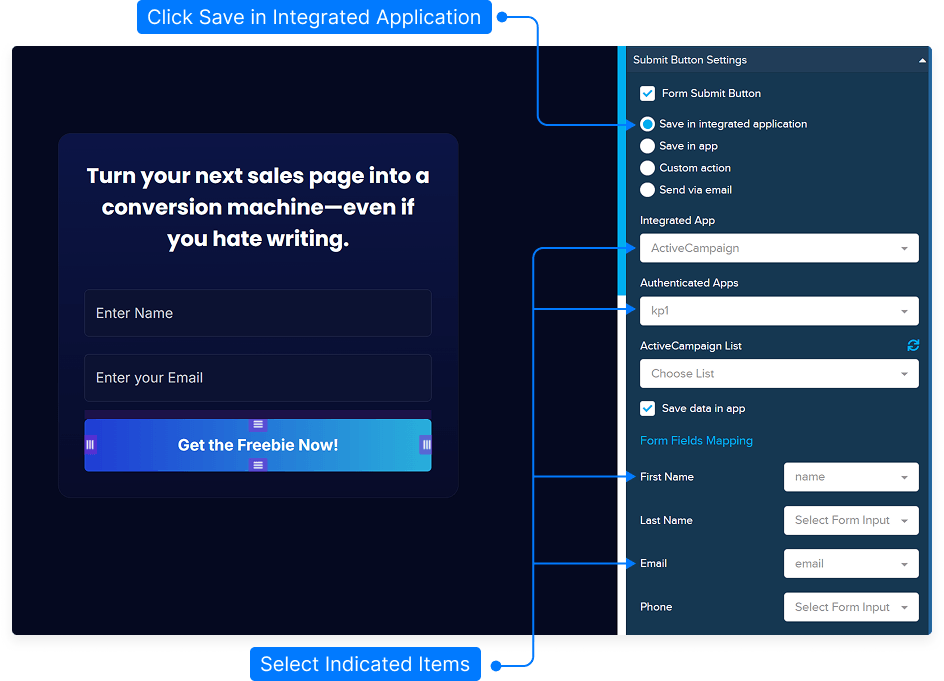
Step 6: Enable Submit Button Settings
Select your form button.
Go to Submit Button Settings.
Tick the checkbox that says this button is a form submit button.
Step 7: Choose ActiveCampaign as the Integrated Application
In the integrated application options, choose ActiveCampaign.
Select the ActiveCampaign authentication/integration name you saved earlier.
Choose the ActiveCampaign list where you want to send your contacts.
Step 8: Select Tags and Save Options
Choose any existing tags from your ActiveCampaign account, if needed.
Add a new tag if you want to create one.
Tick the option to save the form data inside your account as well, if required.
Step 9: Map Your Form Fields
Map your form fields to the correct ActiveCampaign fields.
For example, map your Name field to the ActiveCampaign name field.
Map your Email field to the ActiveCampaign email field.
If you have custom fields in ActiveCampaign, they will appear in the field mapping list so you can map them as needed.
Step 10: Save and Publish Your Page
Save your form settings.
Publish your page.
When someone submits the form, their details will be sent to the ActiveCampaign list and fields you selected.
Step 11: Set Form Success Settings
Use Form Success Settings to decide what happens after someone completes the signup form.
You can choose where the user should go or what message they should see after submitting the form.
For more details about form success settings, please check the related tutorial in the help site.
And that’s it! You’ve successfully integrated your ActiveCampaign account. You can now connect your forms to ActiveCampaign lists, apply tags, map fields, and automatically send new leads into your ActiveCampaign account.