This tutorial will show you how to connect your AWeber account so you can easily sync your email marketing lists and automate your campaigns. Once integrated, you can use AWeber forms, tags, and subscriber data directly within your projects.
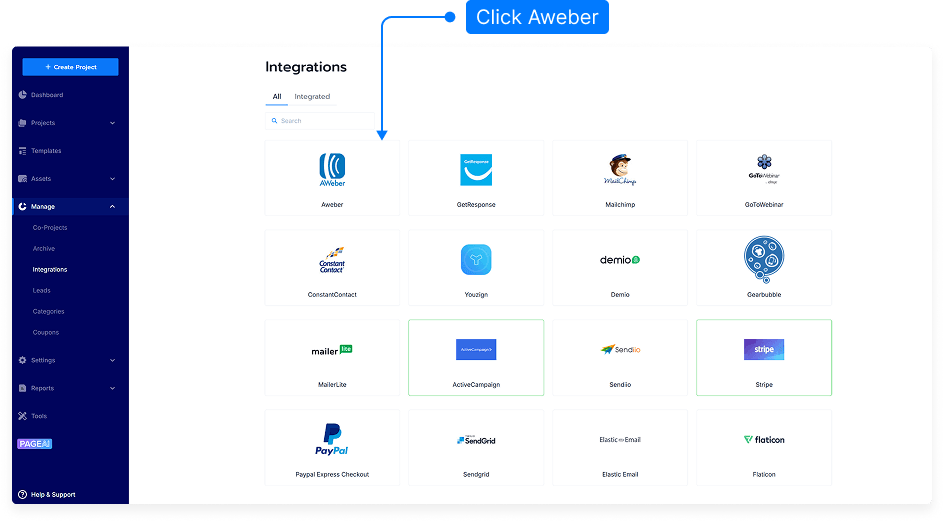
Step 1: Access the Application Management Area
Log into your account dashboard.
Click to Manage menu
Select Integrations from the dropdown list.
Step 2: Locate the AWeber Integration Option
Once inside the Applications section, find the Email category.
Under Email, you’ll see AWeber listed as an available integration option.
Step 3: Add an Integration Name
In the AWeber section, type an Integration Name — this can be any name you choose (for example, “Main AWeber Account” or “Newsletter Integration”).
This name helps you identify the connection later if you manage multiple integrations.
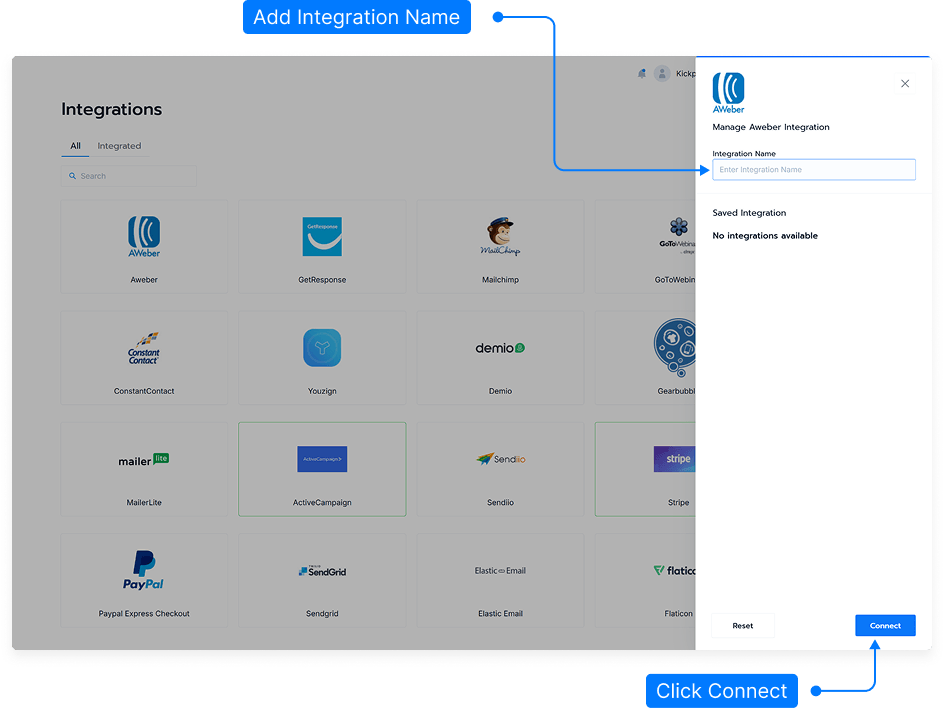
Step 4: Connect to AWeber
Click the Connect to AWeber button.
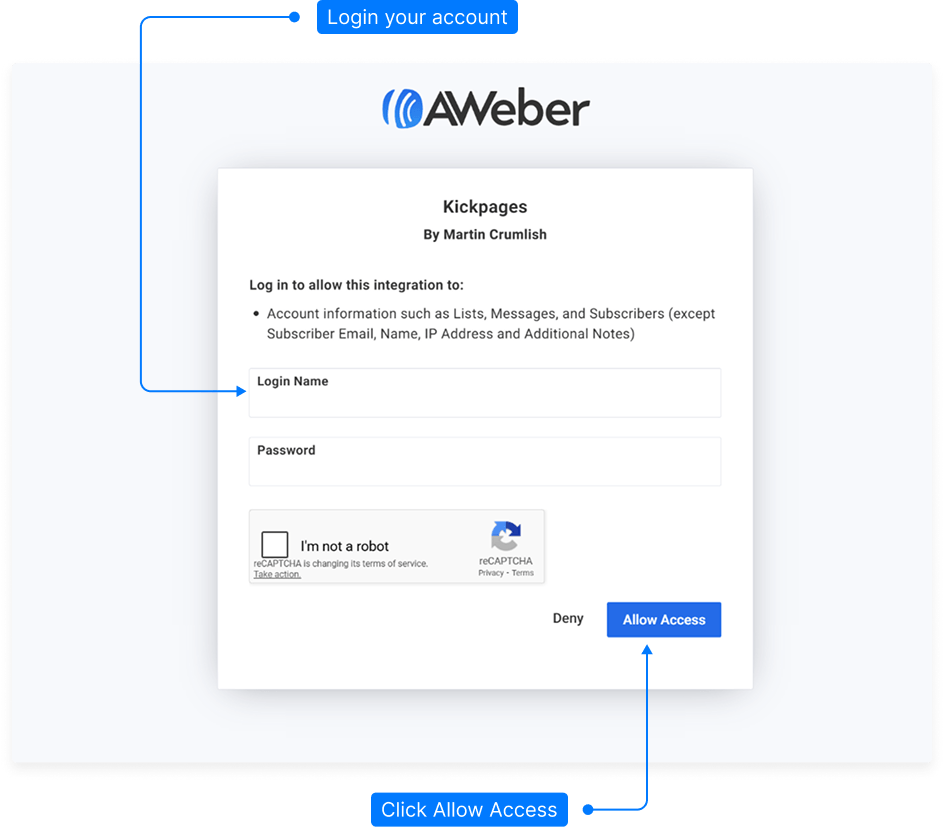
A new window will open asking for your AWeber login details.
Enter your AWeber username and password.
Click Allow Access to authorize the integration.
Step 5: Confirm Successful Integration
Once connected, you’ll see a confirmation message indicating the integration was added successfully.
Your AWeber account will now appear in the list of active integrations.
Step 6: Manage Your Integration
Delete: Click the delete icon next to the integration name if you want to remove it.
Reset: Click the reset icon to reconnect or rename the integration if needed.
Step 7: Test the Connection
To ensure everything works properly, create a test form or campaign linked to your AWeber list.
Submit a test entry and verify that it appears in your AWeber account.
And that’s it! You’ve successfully integrated your AWeber account. You can now connect your forms, landing pages, or automations directly to your AWeber lists for seamless email marketing.